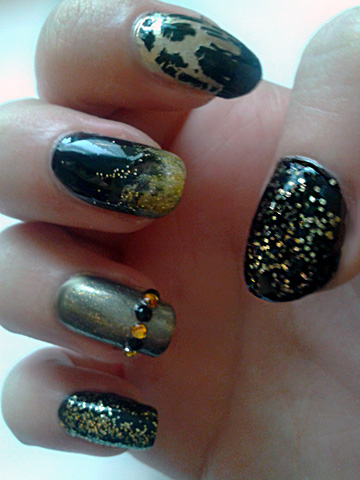
Black & Gold Nails
What I Used:
Barry M Nail Paint – Black, Gold Mine – £2.99 each
Barry M Nail Effects – Black Crackle, Gold Foil – £3.99 each
W7 Magnetic Magic Nail Polish – Gold – 99p
Technic Nail Varnish – Gold Glitter – 99p
Barry M Basecoat & Topcoat – £2.99
Gold and Black Nail Gems
Nail Glue and Dotting Tool
Cosmetic Sponge
Tutorial
Difficulty – 4/10
This is a design I did to go to a masquerade party in where my outfit was black and gold. There’s a lot of steps to this but there’s nothing particularly complicated. You’ll need something to apply the nail gems with (I used a dotting tool), but you can stick them on using either a clear coat or nail glue (I prefer nail glue as the gems will stay on for longer).
1. Apply base coat.
2. Apply two coats of Black to the thumb, middle and pinky nail.
3. Apply two coats of Gold Foil to the pointer finger.
4. Apply two coats of W7 Gold to the ring finger.
5. Apply two coats of Gold Mine to the thumb.
6. Apply one coat of Black Crackle to the pointer finger.
7. Using a cosmetic sponge, apply the gradient to the middle finger. Apply a stripe of Gold Foil and a stripe of Black next to each other on the sponge. Dab onto a piece of paper before dabbing onto the nail. Apply as many layers as needed.
8. Using a dotting tool or something similar, apply a line of nail gems in an alternating black/gold pattern near the top of your ring finger nail (imagine where the line would be on a French Manicure).
9. Apply two layers of Gold Glitter to the pinky finger.
10. Apply a line of Black to the tip of the pointer finger.
11. Apply some Gold Glitter to the tip of the middle finger along the gradient.
12. Apply a top coat to all nails.
As you can see, there are a lot of steps – but no one step is too complicated. Remember to get all your polishes out before starting so you won’t have to go rummaging through your bag to find any you forgot!

