Bubblegum Stripes

Candy Stripes


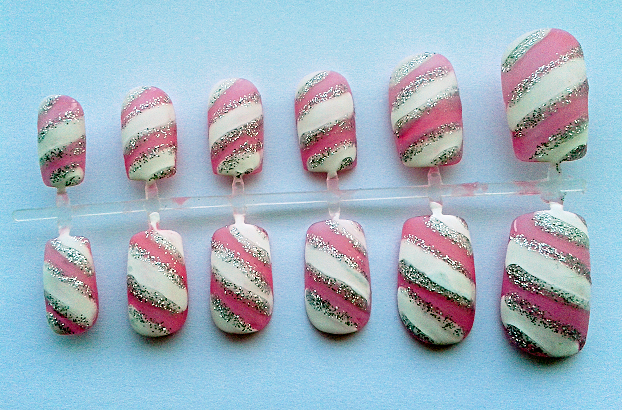
Bubblegum Stripes

What I Used

Barry M Nail Paint – Strawberry Ice-Cream, Matt White – £2.99

Barry M Basecoat & Topcoat – £2.99

Essie Matte About You Mattifying Top Coat – £8.99

Nail Star Nail Art Brush & Pen – Silver Glitter – Bought in Set

Tutorial

Difficulty – 6/10

This one can get a bit fiddly as diagonal lines are more difficult than horizontal or vertical ones as you’ll have to take into account the edge of the brush (unless you want nail polish all over your fingers!)

1. Apply base coat.

2. Apply two coats of Strawberry Ice-Cream.

3. Apply diagonal lines of Matt White. Be careful to keep the spacing between lines even and take extra care at the edges. Apply a second coat if needed.

4. Apply matt top coat.

5. Using a (preferably) long brush, apply the silver glitter between the pink and white lines.

You can’t apply a top coat on top of the glitter if you want to keep the matt finish, so it could take a while to dry, so just be extra careful and give your nails a little longer than usual to dry.

*Available to buy at http://www.etsy.com/uk/shop/NailArtisan*

New Country House Nails in Blue

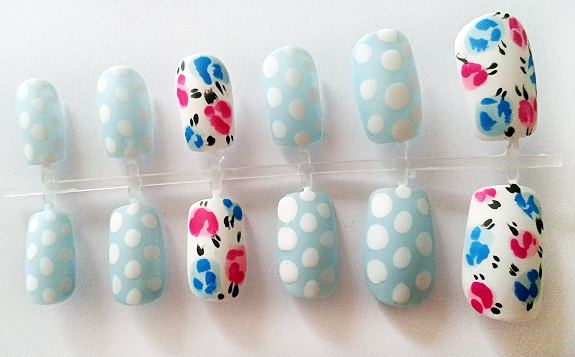
Blue Country

I’m going to make a range of this nail design in different colours due to popular demand. Currently we have this colour; blue, and baby pink in stock, but look out for other colours soon.

We will also soon be stocking new ‘extra short’ nails. These will be made to reach just past the fingertips, for those who aren’t keen on the long nail look!

Visit my Etsy shop to find all the nail sets I have in stock – http://www.etsy.com/uk/shop/NailArtisan

Blue Striped Nails

Blue Striped

Blue Striped Nails

What I Used:

Barry M Nail Paint – Indigo, Cyan Blue, Blue Moon, Black – £2.99 each

Barry M Topcoat and Basecoat – £2.99

This particular design just popped into my head, it’s kind of hard to make out the dark blue lines at the ends there, but they are there, I promise! I just used the layering technique to make the lines, although I also used my new brushes to clean up some of the black lines to make them as smooth as possible (really happy with my new brushes!)

Available to buy at: http://www.etsy.com/uk/listing/150935815/false-nail-set-european-short-nails?ref=shop_home_active

Pretty in Pink

Pretty in Pink

What I Used:

Barry M Nail Paint – Matt White and Peach Melba – £2.99 each

Rimmel 60 Seconds Nail Polish – Clear – £3.69

Nail Star Two-Way Nail Art Pen and Brush – White – Bought online in a set

Essie Matte About You Mattifying Top Coat – £8.99

17 Supreme Shine Nail Polish – Sphinx – £3.99

Tutorial

Difficulty – 3/10

Sometimes it’s nice to do each nail different – as long as you make the overall design coordinated, you can do pretty much anything you want. Here I decided to use baby pink, white and gold and delicate patterns. One of the nails here definitely needs a nail art pen, the detail’s far too fiddly to do with a normal brush – but you can easily substitute that nail for something else if you don’t want to buy a pen. Otherwise though, it’s not that difficult a design to do. I’ve already explained how to do most of these designs already, so here I’ll only explain how to do the criss-cross pattern (ring finger) and the lace pattern (thumb).

Lace Pattern (Thumb)

1. Apply base coat.

2. Apply two coats of Peach Melba.

3. Using a nail art pen, carefully draw on the lace design. Look up lace patterns online for ideas and use them as templates if you find one you like. Go slowly, make sure you’ve got your hand rested so that you can move it around comfortably and don’t squeeze the pen too hard, otherwise it’ll all come out at once.

4. Apply mattifying top coat.

Criss-Cross Pattern (Ring Finger)

1. Apply base coat.

2. Apply two coats of Matt White.

3. Apply mattifying top coat.

4. Take your gold polish and brush as much paint off the brush as possible; you only want a small amount. Using the side edge of the brush, draw lines diagonally, crossing them over at some point on the nail. Depending on which polish you use, the brush may be more or less suited to this – the polish I used has a wide brush and so was more difficult, a thinner brush would’ve have made it much easier.

For the other nails, the middle and pinky fingers have matt top coats, whereas the golden index finger has a normal shiny top coat.

Candy Stripes

Candy Stripes

What I used:

Barry M Nail Paint – Bright Red, Baby Pink, and Matt White – £2.99 each

Rimmel Lycra Pro Nail Polish Clearly Clear – £4.59

Tutorial:

Difficulty – 4/10

The easiest way to do stripes isn’t to do each one individually, instead you put down a base coat and work your way from there. Just follow these steps and you’ll find that it isn’t so difficult as it looks!

1.  First, apply a base coat to your nail using either a specialised base coat, or any clear nail varnish.

2. Apply a layer of Matt White. Leave to dry before applying a second layer.

3.  Apply a wide stripe of Matt Red, leaving only two stripes of white at the outer edges of your nails.

4. Apply Baby Pink in a stripe, this time in the centre of the red stripe.

5. Continue the pattern, making a stripe of Matt White.

6. Use the Bright Red to make a red stripe in the centre of your nail.

6. Apply a top coat of clear varnish.

As you can see by using this method, you avoid having to do much fiddly work making thin lines. If you find that any of the colours you apply don’t aren’t completely opaque the first time, just apply a second layer, although try to avoid having too many layers as it’ll look really thick on your nails by the time your done. If you make any mistakes around the outside of your nails, just dip a cotton bud in nail varnish remover and use it for precise cleaning up of little smudges without ruining your design. This design is easier to alter to whatever colours you want, however many stripes you want or how thick/thin you want the different stripes to be. As you do a few nail designs and get a steadier hand, you can try doing some of the lines free-hand, rather than building it up in layers.