Review – Mediterranean by Barry M

Medditeranean
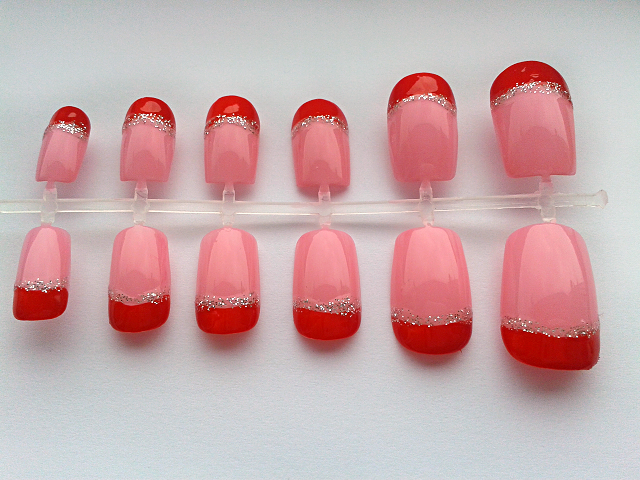
Mediterranean is a very pretty two-toned polish that reflects shades of pink/orange/gold depending on the light. In the picture above which was taken in natural light it appears more of an orange gold, but in artificial light you get a lot more of a pink sheen. The polish goes very nicely with the limited edition gold flake Barry M polish that I got at Christmas – it really bring out the golden tones. It doesn’t have a name on the bottle however and as it’s limited edition, you may want to scour Ebay if you’re wanting to get your hands on that one. The Treasure Chest polish that’s part of the Aquarium collection will probably go just as nicely.

The polish goes on very well, very smoothly. It tends to go on quite thinly, after my first layers I thought I’d need at least three but fortunately it was opaque after two coats. It does okay in terms of endurance but I am seeing a few chips now that it’s been a few days – the nails with the flake top coat are still going strong though.

Although I don’t like this one as much as the Atlantic polish from Barry M’s Aquarium collection, it is very pretty and would go lovely with a gold outfit/accessories. If you put it on I would recommend going with the gold accents on the ring finger just for that extra pop! This one is £3.99 – you can either take advantage of the offer going on at Superdrug right now, which is any three £3.99 Barry M polishes for £9 or the Boots offer which is 3 for 2 on any cosmetics.

Pink Gem Mani

Pink Gem Mani


Pink Gem Mani

What I Used:

Barry M Nail Paint – Strawberry Ice-Cream, Matt White – £2.99 each

Barry M Basecoat & Topcoat – £2.99

Nail Glue

Dotting Tool

Light Pink Nail Gems

Tutorial

Difficulty: 5/10

If you’ve applied nail gems before, then this design will be a doddle – if not, you may find it a bit more time-consuming, but should still manage without too much difficulty.

1. Apply basecoat.

2. Apply one/two coats of Matt White.

3. Apply two coats of Strawberry Ice-Cream, leaving the tips white.

4. Apply a line of nail glue where the pink and white meet.

5. Get a little nail glue on the end of your dotting tool (or orange stick, etc.) and quickly apply the nail gems along the line before the glue dries. Be careful to keep the line straight and make sure the gems are packed tightly next to one another.

6. Apply top coat.

*Available to buy as extra short nails here: http://www.etsy.com/uk/shop/NailArtisan?ref=si_shop*

Pink and Silver Tutorial

My Pink & Silver


Pink & Silver Nails

What I Used:

Barry M Nail Paint – Strawberry Ice-Cream – £2.99

Barry M Nail Effects – Silver Foil – £3.99

Barry M Basecoat & Topcoat – £2.99

Technic Nail Polish – Silver Glitter – 99p

Silver/Clear Nail Gems (Rhinestones)

Gem Applicator/Dotting Tool

Tutorial

Difficulty – 3/10

This design is simple, cute, and really easy to do. All you need are your polishes, a few gems, and something to stick them on with (such as an orange stick or dotting tool).

1. Apply base coat.

2. Apply Silver Foil to all nails except the ring finger.

3. Apply two coats of Strawberry Ice-Cream to your ring fingernails.

4. Apply two coats of Silver Glitter to all nails except the ring finger.

5. Using a dotting tool, orange stick, or something similar, apply three nails gems to the corner of each ring fingernail. In order to do this you will either need to use a little bit of nail glue, or apply a layer of clear coat onto the nail before applying. Remember to put a little bit on your applicator as well so you can pick up the gems. (I personally prefer to use nail glue as it holds the gems on better).

6. Apply top coat to all nails.

And that’s all there is to it!

*Nail set available with this design at http://www.etsy.com/uk/shop/NailArtisan*

Checked Nails

Pink Check


Checked Nails

What I Used:

Barry M Nail Paint – Strawberry Ice-Cream, Matt White – £2.99 each

Barry M Basecoat – £2.99

Essie Matte About You Mattifying Top Coat – £8.99

Nail Star Nail Art Pen & Brush – Silver Glitter – Bought Online in Set

Tutorial

Difficulty – 3/10

This one isn’t actually two difficult I don’t think, especially if you have a long brush for the glitter. It’s all straight lines which makes things less difficult, and in my design I only did the checked pattern on the thumb and ring finger as accents, although it would look just as nice on all the whole hand.

1. Apply base coat.

2. Apply two coats of Strawberry Ice-Cream.

3. Apply diagonal lines using the silver glitter to create the checked pattern. It’s best to make the squares fairly large, and this step is easiest when using a long brush.

4. Fill in alternate squares using Matt White. A second coat may be needed. Try to get the white right up to the silver lines, but not on top of them.

5. Apply a mattifying top coat (don’t worry, it won’t make the silver glitter look any different).

Just be careful using the silver glitter as glitter polishes can take a bit longer to dry as they can be quite thick/gloopy. For more accentuated lines, apply the glitter in multiple layers – I used two in the image above.

*Available to buy at http://www.etsy.com/uk/shop/NailArtisan*

Bubblegum Stripes

Candy Stripes


Bubblegum Stripes

What I Used

Barry M Nail Paint – Strawberry Ice-Cream, Matt White – £2.99

Barry M Basecoat & Topcoat – £2.99

Essie Matte About You Mattifying Top Coat – £8.99

Nail Star Nail Art Brush & Pen – Silver Glitter – Bought in Set

Tutorial

Difficulty – 6/10

This one can get a bit fiddly as diagonal lines are more difficult than horizontal or vertical ones as you’ll have to take into account the edge of the brush (unless you want nail polish all over your fingers!)

1. Apply base coat.

2. Apply two coats of Strawberry Ice-Cream.

3. Apply diagonal lines of Matt White. Be careful to keep the spacing between lines even and take extra care at the edges. Apply a second coat if needed.

4. Apply matt top coat.

5. Using a (preferably) long brush, apply the silver glitter between the pink and white lines.

You can’t apply a top coat on top of the glitter if you want to keep the matt finish, so it could take a while to dry, so just be extra careful and give your nails a little longer than usual to dry.

*Available to buy at http://www.etsy.com/uk/shop/NailArtisan*

Glitter French Manicure Nail Sets

Blue Mani


Pink Mani


After doing this design on my nails I decided I liked it enough to do some false nails with it. I might do some more of this design in different colours if people show interest – I think yellow and orange with gold glitter might look nice 🙂

*Available to buy at http://www.etsy.com/uk/shop/NailArtisan*

Little Black Bows

Little Black Bows

What I Used:

Barry M Nail Paint – Black, Matt White and Peach Melba – £2.99 each

Rimmel 60 Seconds Nail Polish – Clear – £3.69

Tutorial

Difficulty – 4/10

This one’s fairly easy, the bows are the most fiddly bit but even they’re not too difficult.

1. Apply base coat.

2. Apply two coats of Peach Melba.

3. Apply two coats of Black to the tips of your nails.

4. Apply two coats of Matt White to the tips of your nails, leaving a line of black.

5. Carefully draw on the bows using the black nail polish – the less varnish you have on the brush the easier it is. It’s also easier using the side of the brush.

6. Apply top coat.

Pretty in Pink

Pretty in Pink

What I Used:

Barry M Nail Paint – Matt White and Peach Melba – £2.99 each

Rimmel 60 Seconds Nail Polish – Clear – £3.69

Nail Star Two-Way Nail Art Pen and Brush – White – Bought online in a set

Essie Matte About You Mattifying Top Coat – £8.99

17 Supreme Shine Nail Polish – Sphinx – £3.99

Tutorial

Difficulty – 3/10

Sometimes it’s nice to do each nail different – as long as you make the overall design coordinated, you can do pretty much anything you want. Here I decided to use baby pink, white and gold and delicate patterns. One of the nails here definitely needs a nail art pen, the detail’s far too fiddly to do with a normal brush – but you can easily substitute that nail for something else if you don’t want to buy a pen. Otherwise though, it’s not that difficult a design to do. I’ve already explained how to do most of these designs already, so here I’ll only explain how to do the criss-cross pattern (ring finger) and the lace pattern (thumb).

Lace Pattern (Thumb)

1. Apply base coat.

2. Apply two coats of Peach Melba.

3. Using a nail art pen, carefully draw on the lace design. Look up lace patterns online for ideas and use them as templates if you find one you like. Go slowly, make sure you’ve got your hand rested so that you can move it around comfortably and don’t squeeze the pen too hard, otherwise it’ll all come out at once.

4. Apply mattifying top coat.

Criss-Cross Pattern (Ring Finger)

1. Apply base coat.

2. Apply two coats of Matt White.

3. Apply mattifying top coat.

4. Take your gold polish and brush as much paint off the brush as possible; you only want a small amount. Using the side edge of the brush, draw lines diagonally, crossing them over at some point on the nail. Depending on which polish you use, the brush may be more or less suited to this – the polish I used has a wide brush and so was more difficult, a thinner brush would’ve have made it much easier.

For the other nails, the middle and pinky fingers have matt top coats, whereas the golden index finger has a normal shiny top coat.